Reclocking a Procharger F1-A
Reclocking / Clocking a Procharger F1-A:
Some may think that clocking the procharger's compressor housing is enough to "reclock" a procharger. But you would find out the hard way that it's not. If you only clock the housing, your oil gear will not pick up any oil and your procharger will eventually seize up due to insufficient lubrication.
Below are the steps to relocating the oil slinger gear to whichever position the bottom of your F1-A is. This is so the gear will pick up oil and spread it to the other parts of the procharger's internals.
I've seen other reclocking methods of P1 and D1SC models, but the F1 is different with the way the oil slinger gear is attached.
Click pictures to enlarge.
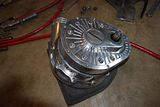
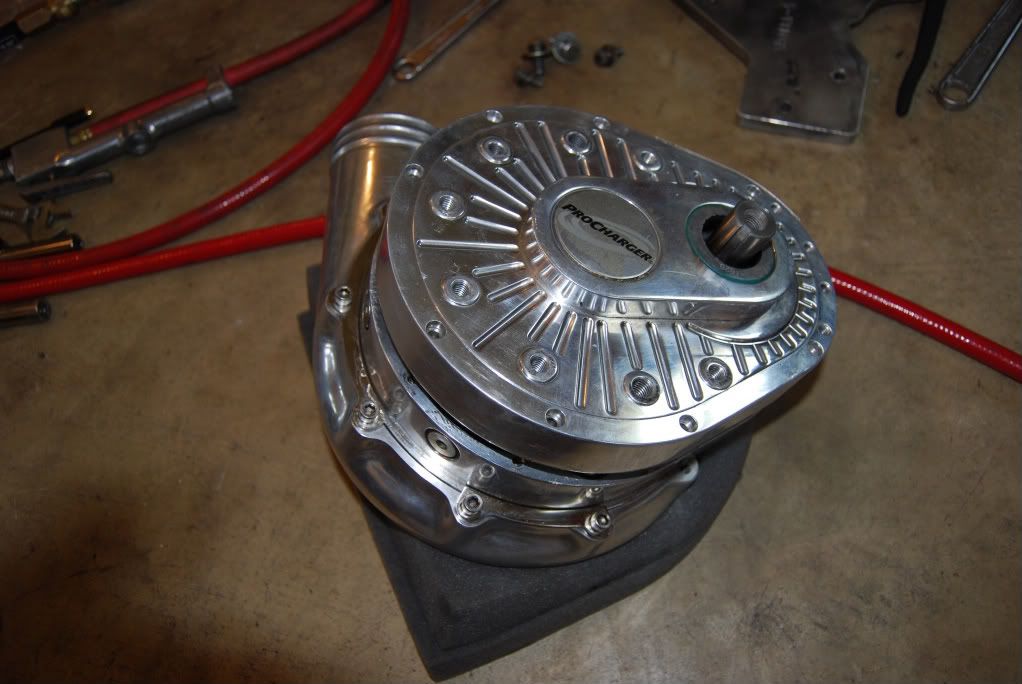
Step 1: Remove the procharger from the bracket. Take out all of the allen head bolts holding the 2 pieces of the case together.
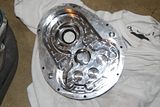
Step 2: Remove the back half of the case. I used some flat head screwdrivers and a rubber hammer to help in this process. Be careful with the screwdriver, don't stick them in too far and hurt anything. Also becareful of the o-ring type seal in the front half of the case.
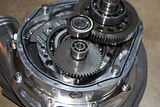
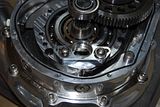
Step 3: Once the back half is completely free, remove it and you can see the internal workings of the F1-A. (In this picture you can also see the "o-ring" type seal I was talking about)
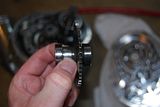
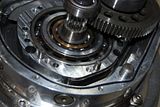
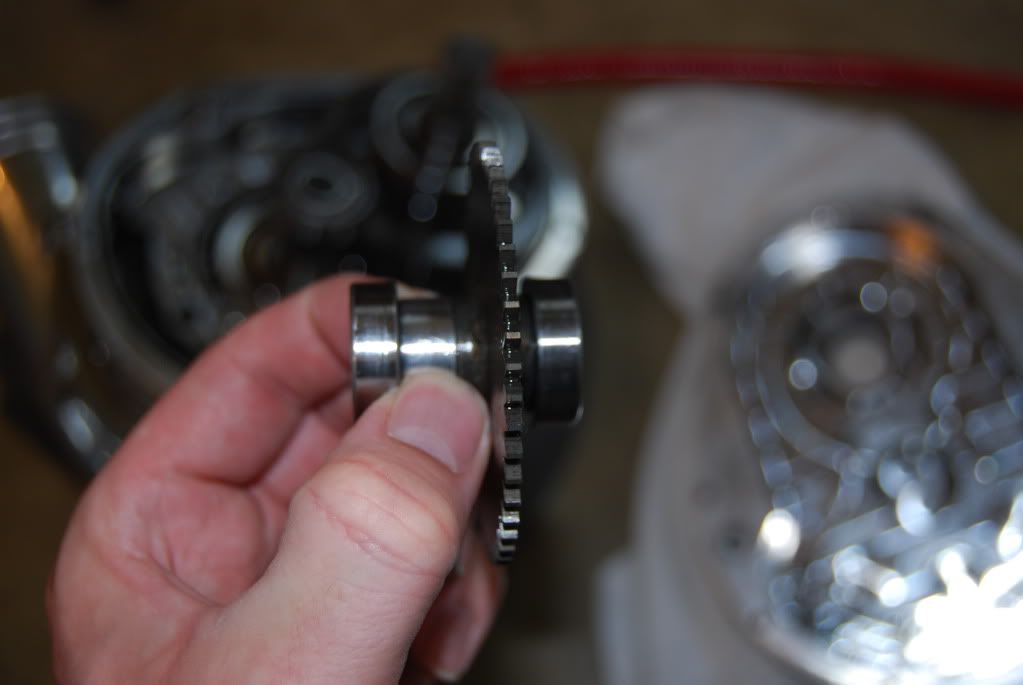
Step 4: Remove the oil slinger gear. It is only pressed in with minimal pressure, you can wiggle it back and for with your hands and it should come out.
Step 5: Losen the 2 allen head bolts holding the oil slinger gear bracket. Then remove them.

Step 6: Pull very EASY on the bracket upwards to slide off of the dowel pins. If you pull too hard on one side it will wedge itself, I found it came off really easy when you are gental with it. If you still can't seem to get it off, just wiggle from each side where the dowels are up, back and forth until it eventually comes off.

Step 7: Once the bracket is off, you will have to make a choice. You need to put the backet in the BOTTOM of whichever way your procharger bracket holds the procharger when installed on the car. You put the bracket in that position.
Step 8: Now is the hard part. You can try to remove the dowels if you want, but I found it impossible. If you have a dowel pin puller tool (cheapest I found was $200) go for it. I just went to the hardware store and got 1/4" rod and made 7/8" long dowels to put in the new location. Then tap them into place, periodically check to make sure the oil slinger bracket will fit over the dowel and flushly when the allen head bolts are screwed back in.
Step 9: Put the oil slinger bracket on in the new location and put the allen bolts back in and tighten them down.
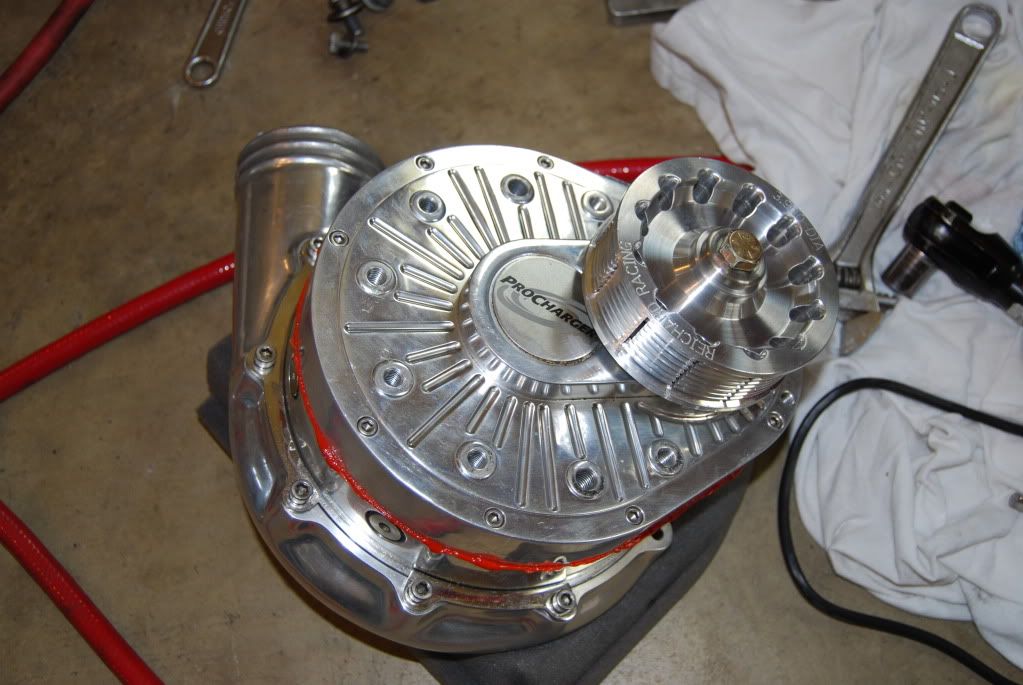
Step 10: Now you just put the oil slinger gear back in the bracket the way it came out, and reinstall the back half of the case. I used a rubber hammer to help seat the case back on. I used some silicone around the edge of the procharger for extra insurance against leaks, you can do this if you want to.
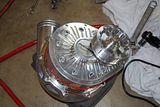 Picture taken while silicone was wet, it doesn't show now that I removed the dried excess.
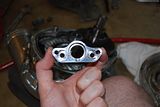
Step 11: Relocate the drain plug to the bottom of the case where the allen head plug is in the same location you just moved the oil slinger gear to.
Good luck, and also, I accept NO responsibility for any damage or malfunction you may come acrossed during the process of this method. Do at your own risk. (Procharger wanted $289 + shipping & 3 weeks to reclock mine)
Some may think that clocking the procharger's compressor housing is enough to "reclock" a procharger. But you would find out the hard way that it's not. If you only clock the housing, your oil gear will not pick up any oil and your procharger will eventually seize up due to insufficient lubrication.
Below are the steps to relocating the oil slinger gear to whichever position the bottom of your F1-A is. This is so the gear will pick up oil and spread it to the other parts of the procharger's internals.
I've seen other reclocking methods of P1 and D1SC models, but the F1 is different with the way the oil slinger gear is attached.
Click pictures to enlarge.
Step 1: Remove the procharger from the bracket. Take out all of the allen head bolts holding the 2 pieces of the case together.
Step 2: Remove the back half of the case. I used some flat head screwdrivers and a rubber hammer to help in this process. Be careful with the screwdriver, don't stick them in too far and hurt anything. Also becareful of the o-ring type seal in the front half of the case.
Step 3: Once the back half is completely free, remove it and you can see the internal workings of the F1-A. (In this picture you can also see the "o-ring" type seal I was talking about)
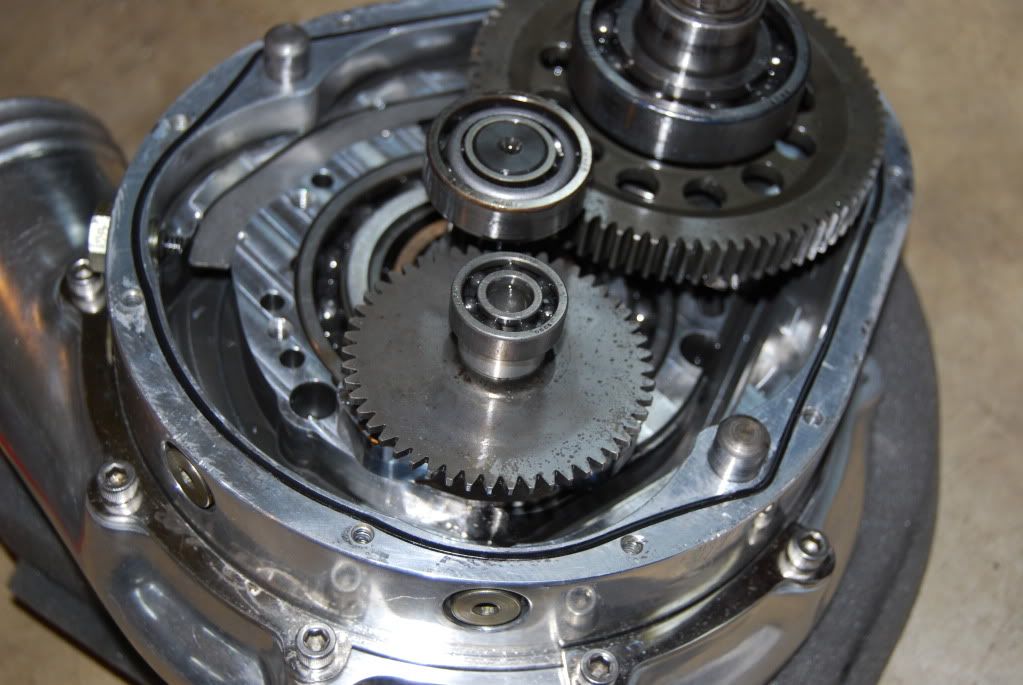

Step 4: Remove the oil slinger gear. It is only pressed in with minimal pressure, you can wiggle it back and for with your hands and it should come out.
Step 5: Losen the 2 allen head bolts holding the oil slinger gear bracket. Then remove them.
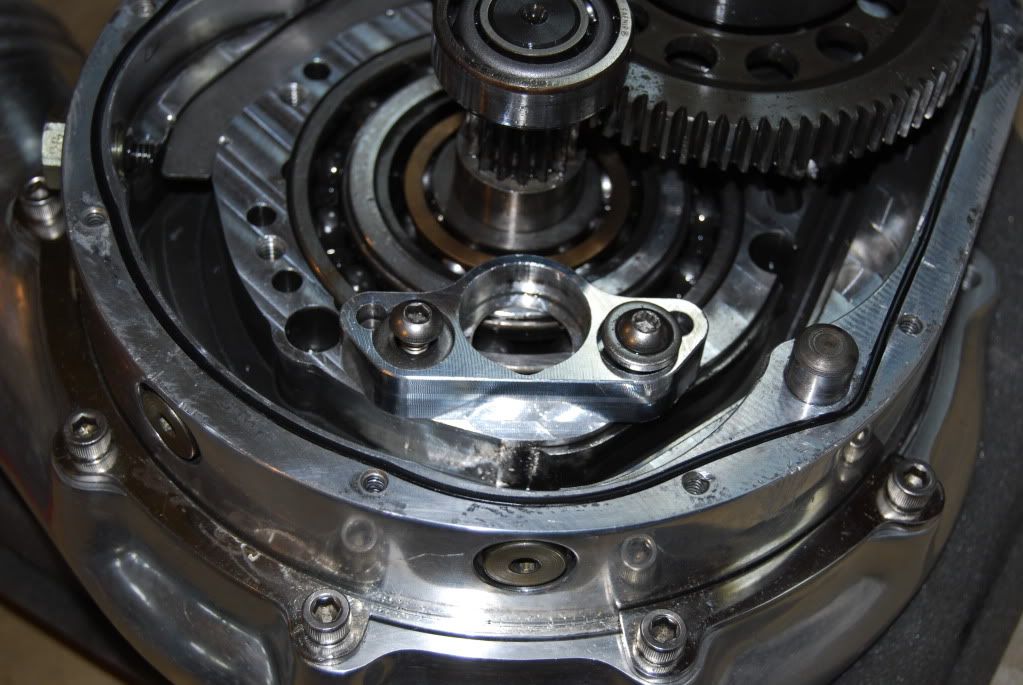
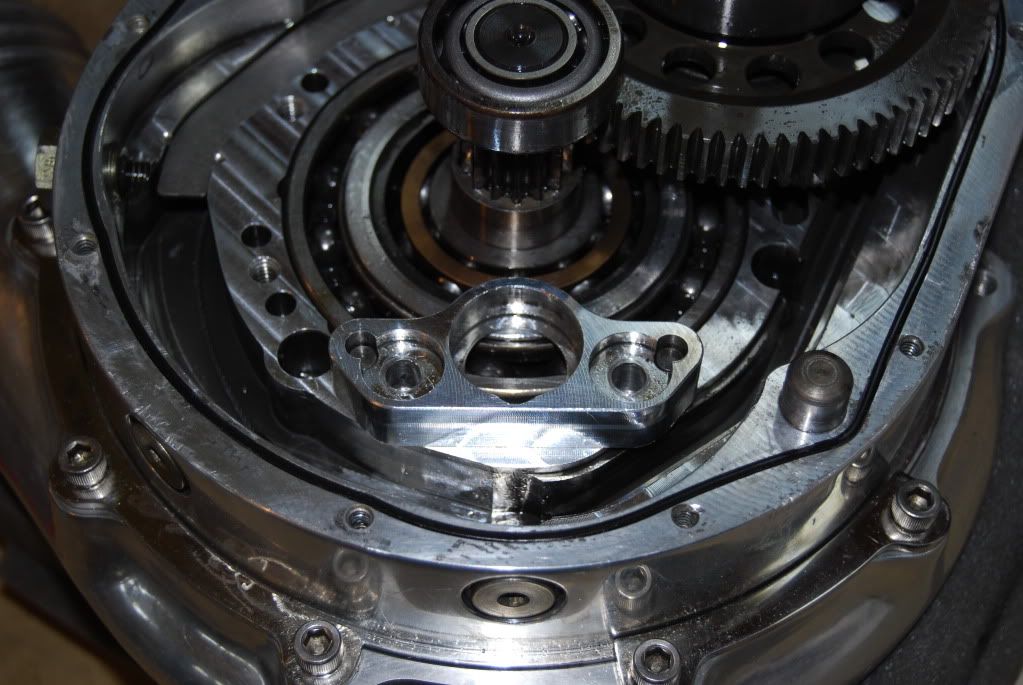
Step 6: Pull very EASY on the bracket upwards to slide off of the dowel pins. If you pull too hard on one side it will wedge itself, I found it came off really easy when you are gental with it. If you still can't seem to get it off, just wiggle from each side where the dowels are up, back and forth until it eventually comes off.
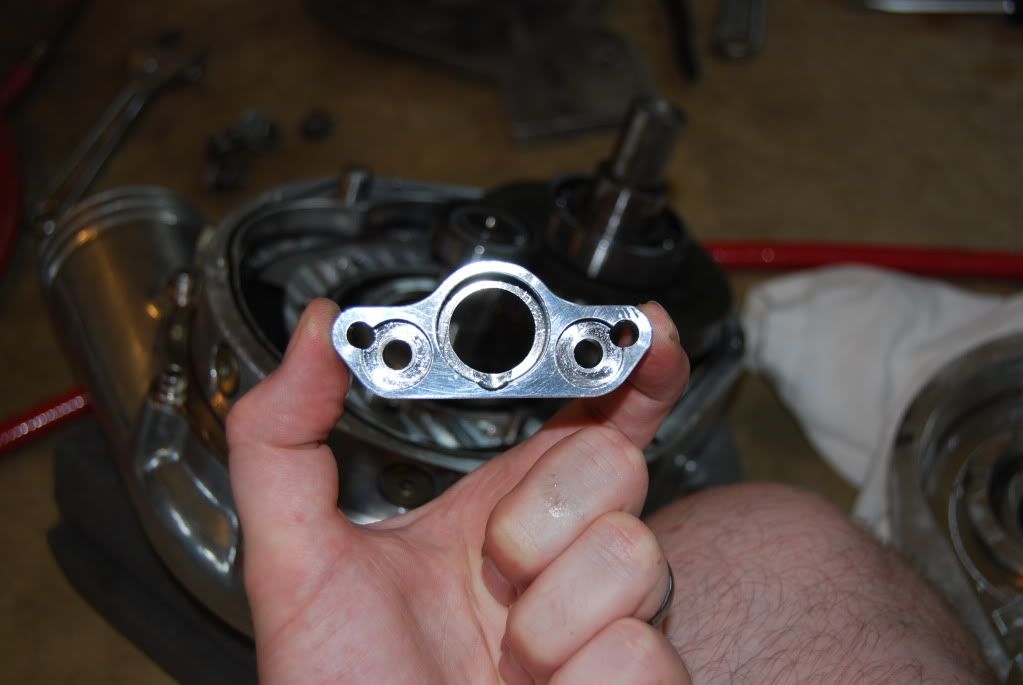
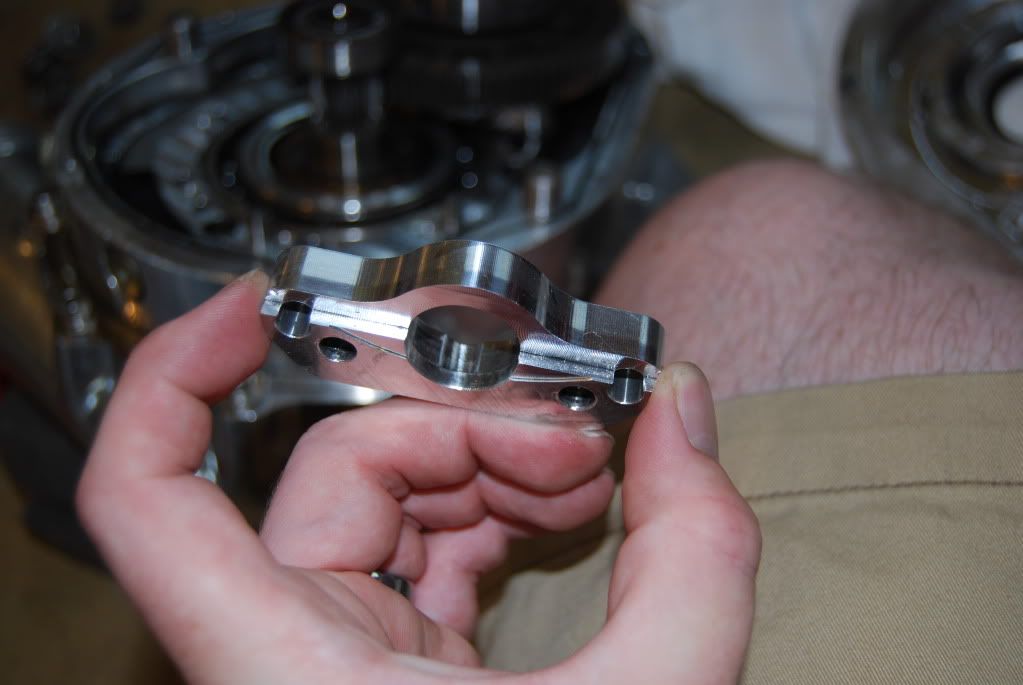
Step 7: Once the bracket is off, you will have to make a choice. You need to put the backet in the BOTTOM of whichever way your procharger bracket holds the procharger when installed on the car. You put the bracket in that position.
Step 8: Now is the hard part. You can try to remove the dowels if you want, but I found it impossible. If you have a dowel pin puller tool (cheapest I found was $200) go for it. I just went to the hardware store and got 1/4" rod and made 7/8" long dowels to put in the new location. Then tap them into place, periodically check to make sure the oil slinger bracket will fit over the dowel and flushly when the allen head bolts are screwed back in.
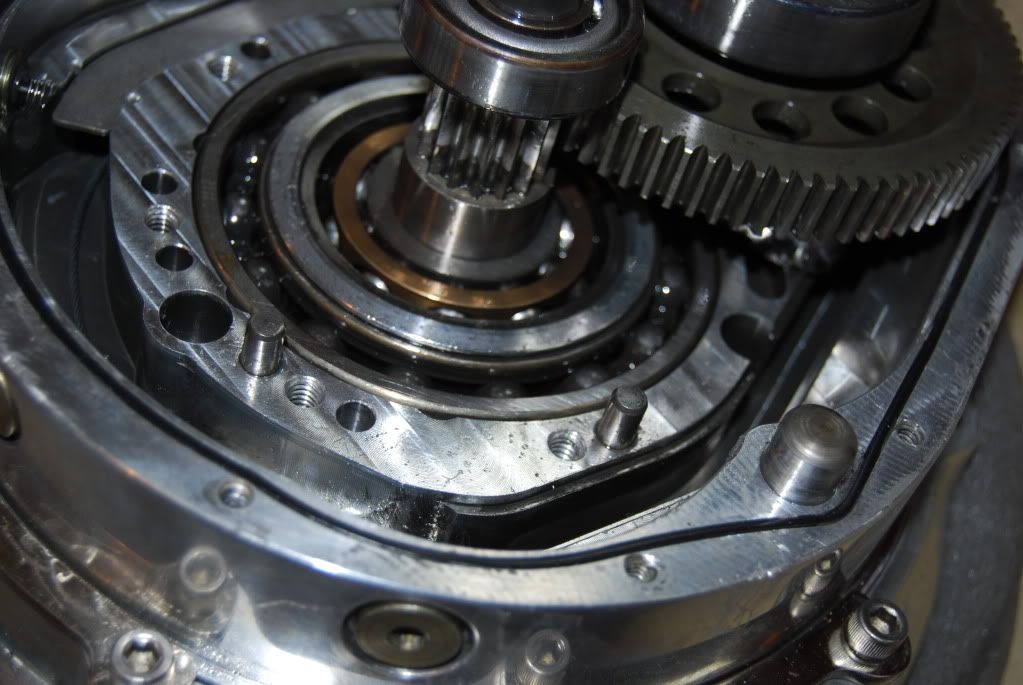
Step 9: Put the oil slinger bracket on in the new location and put the allen bolts back in and tighten them down.
Step 10: Now you just put the oil slinger gear back in the bracket the way it came out, and reinstall the back half of the case. I used a rubber hammer to help seat the case back on. I used some silicone around the edge of the procharger for extra insurance against leaks, you can do this if you want to.
 Picture taken while silicone was wet, it doesn't show now that I removed the dried excess.
Step 11: Relocate the drain plug to the bottom of the case where the allen head plug is in the same location you just moved the oil slinger gear to.
posted by Dustin at
11:28 PM
![]()
![]()


0 Comments:
Post a Comment
Subscribe to Post Comments [Atom]
<< Home